After gathering some feedback about my digipak from the most recent screening I decided to change some elements of the previous design. This is my final edit of my digipak for DJ DES:
Wednesday, 29 February 2012
Monday, 20 February 2012
Friday, 10 February 2012
Journal: 10/02/12
In todays lesson everyone was finishing of their digipaks, posters and music videos; I managed to complete a final version of both yesterday and so did not have much to do during the lesson.
So I added some extra posts to my blog, adding more research giving reasons for why our music video looks like it does. I also added reasoning for why I chose the design I did for my digipak and poster; I also wrote about how I designed the poster to purposely match my digipak.
So I added some extra posts to my blog, adding more research giving reasons for why our music video looks like it does. I also added reasoning for why I chose the design I did for my digipak and poster; I also wrote about how I designed the poster to purposely match my digipak.
Thursday, 9 February 2012
Journal: 09/02/12
After much work on my digipak I finally finished the piece, I changed the design numerous time however stuck to my original template of a six side digipak. The reason for me changing my digipak so many times I believe was due to the progression our music video took. Through the editing process many more effects were added to the video which inspired many elements of my digipak, some of those being the excessive use of bold colours and the typography we had incorporated into the music video.
Journal: 09/02/12
Today myself and Emily decided in our free lessons to do another photo animation for the end of the music video-where Emily (DJ DES) would be getting back into bed after leaving the house. The shoot was very successful as we managed to complete it within ten minutes without having to do any re shoots. We returned to school and put the images on the Mac and formed another photo animation, Emily then added this footage to the music video in Final Cut Pro.
Miss Whittaker had previously suggested that we had DJ DES doing some DJ-ing, however, we were finding it very difficult to find the best setting with the most appropriate mise-en-scene to make it look more realistic. Emily had mentioned that there was equipment in the music department which we could set up to look like a DJ set. We asked a member of the music department if it would be ok if we were able to film in the recording studio and they said it would be fine. After school we set up to film in the music studio using some disco lights from the media department to make the setting look as realistic as possible. We managed to film the footage we wanted and then myself and Emily stayed later after school to finish off some editing using the footage we just got, and to also carry on work on our digipaks and posters.
Miss Whittaker had previously suggested that we had DJ DES doing some DJ-ing, however, we were finding it very difficult to find the best setting with the most appropriate mise-en-scene to make it look more realistic. Emily had mentioned that there was equipment in the music department which we could set up to look like a DJ set. We asked a member of the music department if it would be ok if we were able to film in the recording studio and they said it would be fine. After school we set up to film in the music studio using some disco lights from the media department to make the setting look as realistic as possible. We managed to film the footage we wanted and then myself and Emily stayed later after school to finish off some editing using the footage we just got, and to also carry on work on our digipaks and posters.
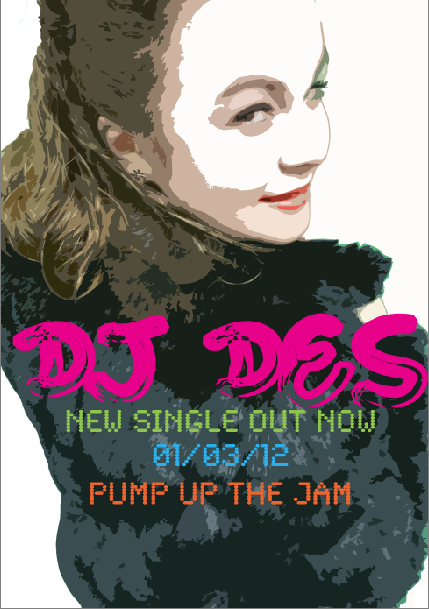
FINAL POSTER
I made a slight alteration with the poster by adding the Sony BMG logo, which is the label we decided that our artist 'DJ DES' would be signed to.
FINAL DIGIPAK
I decided to change my previous digipak because I did not like the way it looked and it did not very professional. From previous attempts at my digipak I found that the best way to make a digipak look appropriate is to use a similar colour scheme throughout each side.
Previously I found an effect to go on the images myself and Emily took during the photo-shoot on tuesday.
 |
| before |
 |
| after |
Wednesday, 8 February 2012
Tuesday, 7 February 2012
Monday, 6 February 2012
Journal: 06/02/12
Todays lesson we focused on editing the footage we had already got by adding more split screens and effects. Emily also completed a section of the music video where the smaller screens continue to split for a short duration of time, once the screens became too small to split any further they then began to reduce to the beat of the music. This is one of our favourite sections of the music video so far as it is very bright and colourful which is everything we wanted our music video to be.
Subscribe to:
Comments (Atom)


